Shop Taste of Home

Friday, December 25, 2009

Winter White Crunchy Salad

I made this for a Christmas eve dinner. It's a nice refreshing salad that is sure to be unlike anything anyone else brings to the table. I didn't snap a photo, so I'll have to make it again.

Ingredients:

  • 3 Pears
  • 1 4-inch spherical jicama
  • 8 large sunchokes (Jerusalem artichokes)
  • 1 bulb fennel
  • ginger
  • walnut oil
  • lemon juice
  • St. Germain liqueur

Preparation:

Peel the pears and jicama. Jicama skin comes off with a tug. Cube them  into medium size dice. Best to make the pears a bit larger and the jicama a bit smaller.

Shave the fennel into 4mm slices. Too thin and it won't have enough crunch.

Peel the sunchokes. Cube into small dice. Toss everything in a large bowl with a liberal dousing of lemon juice. Add a few sprinkles of St. Germain and enough walnut oil to coat all the ingredients. Grate fresh ginger, mixing it in and tasting until you hit the right amount. Correct the lemon juice and St. Germain as needed. Serve cold.

Serves 6-8.

Tuesday, November 3, 2009

The Secret Lives of Rutabagas

I wanted to post a more lengthy dissertation on root vegetables but, as I have limited time I felt that it would be a great idea to share this video tip.

Saturday, October 31, 2009

Best Salad Ever- In under 2 minutes

snapshot-1257004579.948987The delightful late-season bok choi we've been fortunate to receive has become my go-to salad green. As the cool weather has come upon us, the flavor has reached a level of perfection that calls for a radical simplification of its presentation. So here is something you should try, because the results are profound.

snapshot-1257008063.186273

spearfishingSplurge on some of these anchovies. They are worth the price, if only from time-to-time. Maybe they aren't your everyday anchovy, but they come with this cool mini-fork that allows you to spear-fish right from the jar.

After you coarsely chop the the bok choi, mince the anchovies and toss them in. Add a splash of the olive oil from the jar. Squeeze on the juice from half a lemon and- presto! It's magic.

Tuesday, October 27, 2009

Ah, the Lowly Potato

SANYO DIGITAL CAMERA           First, in the interest of hybridization, I am cross-pollinating my blogs by introducing a post that I put up quite awhile ago on my amalgamatedclyde blog. I've since migrated most of that blog to syntheticblog. Don't fret, I only like synthetic food that has been made by hand with natural ingredients.

Second, it has come to my attention that, in this year of potato abundance, as a rather odd inverse of the Irish Famine that began in 1845, our CSA members are having a bit of a struggle to figure out what to do with all of their crop. Furthering the 'oddness' of this situation, the 'Late Blight' struck the tomato crop this year without mercy, as we all know by now.

So, placing second first, I should like to put you on to a recipe that is mostly one of simple technique, to which I gave little increments of thought, and in the end, though I knew it had taken years of experimentation to perfect the outcome, I had only a dim awareness that this small series of juxtapositions of experimental outcomes would matter to someone else, until I fed the roasted potatoes to my neighbor and she asked how I did it. Humbly flattered- she herself is an accomplished cook, I shared my recipe in detail and would like to do so now with all of you.

When people mock the exactitude with which I chop like-vegetables into the same size, they tend mistakenly to attribute this to obsessive-compulsive disorder, when, in fact the physics of heat flow, based on similar surface areas and vegetable volume are the real reason. That's just how you control how much it cooks. Keeping this as rule number one (cut every piece the same: bite-size) we may begin.

Ingredients:

  • Potatoes to feed the lot of you.
  • 2-4 cloves of garlic. 5 if you prefer.
  • enough olive oil to coat your skillet and a bit more
  • a secret pat of butter
  • minced rosemary
  • salt and pepper
  • parsley? You decide.

Preparation:

With any of the varieties we have received, a thorough washing is the best place to begin, but skip any peeling.

Pre-heat your oven to 350 degrees.

Plan your dicing in a 3-dimensional coordinate space and you will get lots of cubes. Do I have to draw this?

Heat your skillet. It had better be big enough to hold all the potatoes. When it's getting too hot to touch with your hand, stop touching it and add the olive oil. Whirl it until it visibly thins in viscosity. Add the secret pat of butter while no one is looking and let it melt into the oil.

Crush the garlic with the flat part of a knife, or use a hammer if you prefer. You want to expose the inner flesh but keep the cloves intact so you can remove them later. Who wants to eat burned garlic?

Saute the garlic for a few minutes, extracting as much garlic juice as is practical. When it starts to brown, remove it to the the waste bin or composter.

Add the potatoes and jack-up the heat. Turn constantly with a spatula. As they begin to brown, add salt and pepper. Stir more.

Now, add the minced rosemary. Remove from the stove and pop into the oven. You can cook it covered or uncovered. Both ways seem ok to me.

After 15-20 minutes, stick a fork in 'em and see if they are done.

Choose now to toss in minced parsley, or forever hold your peace.

Consume.

---------Ok onto issue number one:

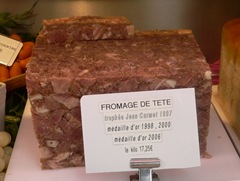
Several years ago, when Daniel Boulud opened another of his grand palaces of degustation, I noted that the menu included, nay, featured, certain items that should only be characterized as offal, and also, though perhaps not fitting precisely within this characterization, pieds de cochons, which I am pretty sure is French for 'proceed with caution.' I took it all as the antics of another bored chef-genius, who, tiring of short ribs and steak-frites, felt the need to delve deeper within his animal. A press release quoted him saying he had been 'transported back to the food of his childhood.'  A recent glance at the Bar Boulud menu turned up this telltale positioning of charcuterie as merely 'cute':

FROMAGE DE TÊTE GILLES VEROT 
HEAD CHEESE TERRINE
GILLES VEROT'S AWARD WINNING SPECIALTY

tete

My main purpose here, though, is not to dwell on innards and the pursuit of grossification, but to point out that in cooking, the dream of the Alchemist sees its true realization. From baser ingredients come precious masterpieces. There is a certain process whereby the humble onion, the potato, a pasta, bean, a simple thing, achieves a unity with its fellow pot-sharing comestibles that is not fully explicable in terms of the backward-engineered recipe, as achievable as this may be.  E pluribus unum, as the dollar bill would have it: out of many, one. Call it a gestalt of cooking. The 'season, taste, repeat' cycle of fine-tuning flavors is aimed at hitting a bulls-eye that is a unitary experience, not a mere mixture of ingredients.  I submit for your approval: the mac 'n cheese, the chili, the pasta e fagioli. A catalog of comfort foods, perhaps, but ones built upon a few simple ingredients that magically harmonize in one another's presence like the understudy cast of a Broadway play who, together, trump a playbill of stars.

And so I turn to another such recipe, one that I've only recently encountered, but which perfectly fits into this category: Bacalhau à Brás.  This is a Portuguese recipe which I can describe, without oversimplifying, as a salt-cod hash. I first sampled it in Maplewood NJ at Churrasco BBQ & Steakhouse. The video clip shown above is a bit more high-brow in execution, with its fancy prawns and cucumber,  but is still in the same vein.

churrasco

 cod  how to talk

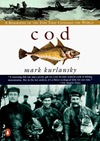
Let me rewind a bit to touch on my fascination with salt-cod.  It's a big topic and an entire foodie book has been written about it.  I really haven't read that book,  so I'll just summarize according to another book I haven't read. If you remember anything about 'Mutiny on the Bounty,' you'll recall Captain Bligh, whose name sometimes connotes cruelty, but should instead summon the qualities of intellect, loyalty and steadfast courage. He was a brilliant sailor, managing to navigate 3000 miles of the Pacific, in a dingy,  to save the lives of the fraction of the crew who fulfilled their sworn allegiance to the captain of their vessel. Well, it turns out that Bligh's mission, foiled in the famous case, but later revisited, was to transplant breadfruit trees from the Pacific Islands to the Islands of the Caribbean in order to feed a growing population of slaves, cut-off by the Revolutionary war from their life-sustaining supply of salt-cod. As it so happened, the enslaved workers balked at the breadfruit, in all of its various preparations: steamed, as a pudding, tofurkey style- none of it was for them. Even today, throughout the Caribbean, you will find the lingering evidence in a continued reverence for salt-cod dishes. And let's not forget who was doing all that fishing. It was the Portuguese emigrant, who had settled in Newfoundland or Fall River, or New Bedford. They sailed out on large creaky vessels and then were dropped over the side in tippy little dories with nothing more than oars, hooks, bait, and a few hundred feet of fishing line. But they caught lots of fish! Of course, in the absence of refrigeration, the proven method of preserving their catch was desiccation through salting.  In a culinary sense, this is where  my interest was piqued.

One revives the salted fish through immersion in a fresh-water bath, changing the water over the course of a couple of days, by which time most of the salt will have been removed. Today this happens in the fridge of course, but I suppose it would have been done at room temperature in bygone days. Bye, gone days! Now the fish is ready for cooking. Whichever recipe you choose, one fact that becomes apparent immediately is that you have not, through the water bath process, returned the filets to their pristine state, for the salt exerts a curing action on the flesh which causes a subtle, curious and, in my opinion, delectable adulteration in its flavor. Its the difference between picnic shoulder and ham.

1080 
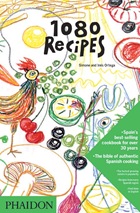
At the outset of this peripatetic discourse I promised a recipe, so let me hop to it, lest this post languish interminably in 'draft' mode.  If you happen to own this cool Euro cookbook, 1080 Recipes, you need only turn to recipe 551, where the dish is named in the descriptive fashion 'Bacalao con Patatas Paja y Huevos Revueltos'. So now you know the secret: it's basically shredded bacalao with fried matchstick potatoes, onions, and scrambled eggs. It couldn't be simpler, ingredient-wise.  Keeping a blind eye to the cardiovascular and caloric demands of the dish, let me elaborate a little bit on the magic  that happens when you follow the recipe. First, you crisp the thinly-julienned potatoes in sunflower oil and set them aside. Then, reserving a small amount of the oil of the sunflower, you add the onions, which have been sliced, and pulled into rings, and then, ever so slowly, you coax them into a sweet, light-brown, gloriously softened manifestation of their original harsh selves. Following, you add the desalted cod, which I meticulously shredded into threads of exactly the same size, but which you may pull apart in a less obsessive-compulsive fashion. Did I mention that cooking can be therapeutic?

After a little browning, the last step is to crack the eggs directly into the hot skillet, scramble them with a fork and, as they begin to solidify, add the crunchy potatoes. After the whole thing firms up, it's ready for plating. I added some Chohula Hot Sauce, but Crystal, Frank's, or Goya would all be appropriate, or skip the hot sauce altogether if you can't handle it. Don't be ashamed, just enjoy.

Saturday, September 12, 2009

Green Tomatoes: Not Fried

As green tomato season encroaches upon us (and yes, I know what you're thinking about red tomato season), it seemed wise to exhume this page from my newspaper clippings drawer. Since the half-life of marmalade in our refrigerator is measured in milliseconds, I determined there was sufficient justification for the small effort required by this unassuming recipe.

Occasional readers of this blog may have noticed that I tend only to publish recipes concocted by myself or my trusted band of culinary cohorts. So this is the first incident of outright theft. It is my fondest wish that the New York Times will view it as a nod of respect rather than a provocation to file a suit in accordance with the Digital Millennium Copyright Act, of which I remain completely ignorant.

Since I had only 3 green tomatoes in my fridge, I reduced the overall quantity to about 3/5ths, though my downward adjustment of the sugar to a mere 2 cups could have been downwardly adjusted even more without deleterious effects. I upped the quantity of lemon juice by an unknown amount, measured only by intermittent tasting, until the acidity seemed in balance.

In the end, the result was about a pint of syrupy marmalade, which I jarred into 2 separate 8-ounce containers, keeping one and gifting the other.

If I were to make it again, I might decide to tilt it toward the chutney end of the preserve-confiture spectrum, with the addition of pistachio halves and perhaps even some hot chilies. The present result proved to be quite delicious on peanut butter and toast, and the reader who comes to the table with an open mind is certain to discover other delectable combinations for this humble receipt.

clipped from www.nytimes.com
Recipe: Green Tomato and Lemon Marmalade
Published: August 22, 2007

1 lemon, thinly sliced and seeded

2 1/4 pounds green tomatoes (about 5 large tomatoes), cored and thinly sliced

3 1/4cups sugar

2 tablespoons fresh lemon juice

Pinch of salt.

1. Bring lemon slices to a boil in a pot of water. Drain.

2. Combine all ingredients in a saucepan along with 1/4 cup water, and bring to a simmer, stirring, to dissolve sugar. Cook at a bare simmer until tomatoes and lemon slices are translucent and syrup thickens, 20 to 30 minutes. Cool completely; store in refrigerator.

Yield: 1 3/4 cups.

  blog it

Thursday, September 3, 2009

My Solution to the Salsa Verde Equation

salsa verde equation copy

OK- better late than never. Probably you've used your tomatillos. I think I have a jalapeño or two left, but should you ever come to possess these in concert again, whether willingly or not, here is what I chose to do with mine. I am giving this recipe a name that befits a highly focus-grouped jarred salsa that you might find at grocery stores, but in this example, you make it yourself.

Fire-roasted Salsa Verde

Ingredients:

  • cup your hands together and fill them with tomatillos
  • repeat above with jalapeños
  • 1-2 large cloves of garlic, well-smooshed (press or mortar and pestle)
  • extra-virgin olive oil. extra extra is fine as well.
  • salt

Preparation:

The 'fire-roasted' part alludes to the barbecue, which should be readied before you proceed to the vegetable prep.

  • Remove paper from tomatillos, place on skewers
  • Place jalapeños on skewers

You will probably want to use separate skewers for the tomatillos and jalapeños, since they could, conceivably, be finished cooking at different times.

Place skewers over a medium hot flame and roast until the veggies blister and char slightly. Remove before they turn to cinders and allow to cool.

Toss the tomatillos into a food processor or blender. Slice the jalapeños in half and remove the pith and seeds. These can be used to modulate the heat of the salsa, so get a feel for how much zing there is and factor-in your target level of mouth-burn. Adjust accordingly and add to food processor. Add garlic and about a tablespoon of olive oil.

Whir until well-whirred. Season with salt, to taste. Apply liberally to meat, fish, chicken, or vegetables.

Wednesday, August 19, 2009

'Scarole

11_202857 I must admit that I didn't know much about escarole before I married into an Italian-American family. I probably would have regarded it as 'tough lettuce- lettuce from the wrong side of the tracks,' had I noticed it at all. It was a vegetable that slipped under the radar. But then I learned to cook it and now it is part of my ordinary repertoire of greens. 'Scarole is the Italian-American pronunciation I learned, but you should feel free to call it escarole when the grocery clerk has to price-check it because he doesn't recognize it. Get comfortable with escarole- it's worth it!

This week I received a couple of recipes from our regular contributors and I include them below, followed by my own interpretation.


-Clyde Tressler


Escarole and Beans

Ingredients:

  • 2 heads of escarole
  • 2 cloves garlic, minced
  • 3 tablespoons olive oil
  • 2 cans cannelini beans- not drained
  • salt and pepper to taste

Preparation:

Cut off stem ends of escarole. Wash escarole in many changes of water until water is clear.

Steam escarole until wilted or cook in pressure cooker for 3 minutes.

Saute 2 garlic in olive oil until softened but not browned. Add escarole and liquid and cover for about 5 minutes.  Add cannelini beans  to escarole and garlic and season with salt and pepper to taste.

Cook all for about 15 minutes on low simmer.


We prefer to make this a day in advance of serving and heat up at dinner time and serve over pasta, sprinkled with grated Romano or parmesan cheese.  Elbows are the pasta of choice. 

My husband's family served the escarole and beans as a meal without pasta- accompanying the dish with crusty Italian bread.

-Barbara Savino

Escarole with Chickpeas

Ingredients:

  • 2 scallions, chopped white and green parts
  • 2 cloves of garlic pressed
  • 1/2 can chickpeas, drained
  • 2 heads escarole, chopped
  • sea salt and freshly ground black pepper to taste
  • Extra Virgin Olive Oil to saute

Preparation:

Heat oil on medium high heat in a saute pan, add scallions and garlic and cook until garlic is slightly golden. Add the chickpeas and stir. Add escarole and cook until wilted and tender. Season with salt, pepper and a bit of additional really good Extra Virgin Olive Oil if desired.

I hope you enjoy it.

Randy

www.RandyRabney.com

Escarole and Lentils

This is the easiest recipe on the planet.

Ingredients:

  • 1 cup large lentils (green or borwn)
  • 2 heads escarole, washed and chopped once (or not)
  • 1 quart water or chicken stock
  • salt and pepper

Preparation:

Wash lentils. Forget about looking for stones. You won't find any. Dump, cautiously, into large pot. Add stock and cook over medium heat until lentils are al dente. Add escarole, cover and simmer over low heat until escarole is softened. Adjust liquid to taste. Some like it soupy- some not. Salt and pepper likewise to taste.

By the way, you'll notice that these recipes all pair escarole with legumes or pulses. In passing, I would add that escarole is delicious on its own, sauteed with a little garlic and olive oil. Enjoy!

-Clyde Tressler

Wednesday, August 12, 2009

Perspectives on Grilled Corn Techniques

SANYO DIGITAL CAMERA           We've been getting some really excellent corn from Cheryl, in case you haven't noticed. Even Yours Truly, a devotee of the 'corn is for animals' School of Thought, has been moved by these sweet, succulent ears. And so I must perpetuate a perennial debate: how best to cook corn on the grill? Here are three widely-accepted methods, broadly sketched.


  1. remove the silks, retain the husks, optionally add buttery condiments inside, and let the heat do the rest.
  2. shuck the corn, wrap it in foil, optionally add buttery condiments inside, and let the heat do the rest
  3. shuck the ear until it's 'bare nekkid,' place on the grill and let the heat do the rest.

The most obvious conclusion is that, if you want to add some type of herbed-butter during the cooking process, you'll do best with techniques 1 and 2, as these afford flame-retardant protection to the added fat.

The third method, what must seem to the 'corn must be protected from flame' cult, actually has a lot to offer. First, any buttery condiments can be added afterward, at the discretion of the end-user. Second, without any cover-up, it's probably the fastest-cooking approach. But my favorite reason for using this technique is the subtle popcorn overtones in flavor of the delicately-caramelized kernels. Careful turning and constant observation will maximize this delightful effect.

No matter how you spear it, grilled corn is a summer treat not to missed.

-Clyde Tressler

Monday, August 10, 2009

Tomato Blight

I spoke with Cheryl Rogowski last week, and had an opportunity to ask her about the outbreak of tomato blight that has struck the region this year. Cheryl said she had lost around 1000 of her 5000 tomato plants. Well, the good news is that leaves 4000 plants. Cheryl felt that there would be plenty of fruit this year, but nowhere near last year's bounty.

Because of her farm's status as Certified Naturally Grown, the use of synthetic chemical fungicides is prohibited, limiting the number of ways she has available to battle the disease.

Below is a clipping from an article in the Boston Globe that gives a good feeling for what farmers in the northeast are experiencing.
clipped from www.boston.com

Late blight yields bitter harvest

Disease that spawned Ireland’s potato famine hits New England

Organic farms, including Lindentree, have been hit especially hard by the outbreak, because they cannot use the strong, synthetic fungicides that work best to protect their harvest.

Organic farms, including Lindentree Farm in Lincoln, have been hit especially hard by the outbreak of the contagious fungus.
Produce farmers in Massachusetts and elsewhere in New England
are now battling late blight, a fungus with tiny spores spread by the wind that rots tomato and potato plants. It is the same disease that was responsible for the 19th-century Irish potato famine.

LINCOLN - Slumped in his tractor, Ari Kurtz looked out at his fields, where rotting fruit and gnarled plants fringed with dead leaves were all that remained of what should have been a bountiful tomato harvest.

“This has been one of the most challenging years organic farmers have faced in the Northeast,’’ said Bill Duesing, president of the Northeast Organic Farming Association.
 blog it

Wednesday, August 5, 2009

French Horticultural Beans: No Fancy-Pants Preparation for Imposingly-Named Bean

SANYO DIGITAL CAMERA

What a delightful mid-summer treat, and like the season, a fleeting one too. As they mature, the debutante beans inside plump and primp for drying and winter cooking in casseroles and stews. But while they are small, the French Horticultural bean offers a tasty respite from the green or 'string' bean with which we are perhaps better acquainted.

ron_popeilFor one thing, there are no strings! This fact, to paraphrase Ron Popeil, saves hours of kitchen drudgery. You need only snip-off the stem end and, if desired, cut the longer beans in half. (I include this second step to broaden the appeal of this bean to the younger generation, who have generally smaller mouths.)

-Clyde Tressler

Here's how I finished them:

Ingredients:

  • beans
  • Extra Virgin Olive Oil, 1 tablespoon
  • butter, one-half, or one guilt-laden full teaspoon
  • several sprigs of fresh thyme
  • salt and pepper

Preparation:

  • Place washed and trimmed beans in covered, microwave-safe container. Microwave for 2 minutes. After, leave the beans in the dish, covered.
  • Heat a large skillet and add the olive oil. When the oil is hot, add the butter and allow it to melt in the oil. Mix the two with a spatula and then add the thyme.
  • Toss in the beans and any liquid that has accumulated. Keep the heat high. Cook the beans to your preferred tenderness. You should have some leeway here, as the beans shouldn't been completely cooked from their visit to the microwave. The little thyme leaves will fall off the stems during this process, and the stems can be removed. If you use dried thyme, try not to feel bad about it. You won't have to trouble with the stems.
  • Finish with salt and pepper and serve in an appropriately French horticulturally-themed dish.

Thursday, July 30, 2009

Substitutions Are Your Friends: Choose Wisely

pancetta I love pancetta. I like to make it with bucatini all'amaticiana. I love to use it for simple dishes like pancetta with broccoli, ziti, and garlic. These are fast and delicious recipes that get dinner on the table in a half hour. But what if you don't eat meat, or have other dietary obligations that keep this delightful, cured Italian pork bacon off your table? This is the question that troubled me. I wanted to offer a recipe that covering the poles of these flavors- the green veggies, the crispy salty meat, and the pasta, but how best to avoid the pork? The answer came to me in a dream. A dancing cured poultry product pranced before me, beckoning me to use it as a substitution. But what had I see? Had it been chicken sausage? Or perhaps it was turkey bacon? Yes. Turkey bacon. This seemed to hold promise as a pancetta replacement.

Alas, because I was about to embark on a trip I was unable to test this hypothesis. Fortunately, my dear friend, fellow cook, Maplewood resident and CSA participant, Jocelyn Ruggiero, aka Foodie Fatale, was intrigued enough to make a version herself and to offer both her assessment and preparation of the dish. Thanks, again, Joce!

-Clyde Tressler

Ingredients:

  • 5 or 6 pieces of Applegate Farms turkey bacon, chopped into small cubes
  • 3 or 4 scapes, chopped into small pieces (approx ½ inch)
  • 2 green onions, chopped
  • 1/2 a head of green garlic, minced
  • handful of sun dried tomatoes
  • 1 head of kale, stems removed
  • extra-virgin olive oil
  • 8-10 ounces whole wheat pasta (ziti, rigatoni or similar)

Preparation:

  • Pan fry bacon until crispy, then remove and set aside.
  • Saute onions and scapes in olive oil until onions are translucent and scapes are wilted
  • Add chopped kale
  • Drizzle a little more olive oil over kale, cover frying pan and cook over low heat.
  • After approximately 5 minutes add reserved bacon and pepper/kosher salt to taste
  • Continue to cook kale until tender, approximately 5 more minutes. Once the kale is cooked, I like to turn the heat off, and keep the pan covered for a few minutes.
  • Toss with 8-10 ounces of whole wheat pasta, sprinkle with Parmesan and serve!

Friday, July 17, 2009

Vegetarian Cooking For Young People- A FREE Class!

Our blog contributor Randy Rabney wanted to let all of us in the CSA family to know about the free class she is offering:


randy

Vegetarian Cooking Class for Young People (ages 10‐15)And Their Adults

At Whole Foods Market, 2245 Springfield Ave., Vauxhall, NJ

 Wed., July 22nd

Time: 6:30-8:00 PM

Many young people are choosing to be vegetarians but often are not getting the nutrition that they need. Come learn how to make healthy choices and prepare and sample an easy, delicious, health conscious recipe.

Randy Rabney trained as a Chef at the Natural Gourmet Cookery School in NYC. She has cooked in the kitchen of the Golden Door Spa in Ca. and has taught cooking classes to children in NYC. She is a mom and also has a degree as a Certified Holistic Health Counselor.

For more info, visit Whole Foods or contact Randy Rabney at (646) 734-9077.

Sign up at Whole Foods Market Customer Service or call 908-688-1455

Visit

www.RandyRabney.com for your Free Foodie Survival Guide: 3 Health

Conscious Recipes for Every Lover of Food.

Thursday, July 9, 2009

The Ultimate Dressing

I use the word ultimate because I have yet to find something I don't like it on!

-Lea DeCosta

www.wellnessextended.com

Ingredients:

  • 2 tablespoons extra virgin olive oil
  • 3 tablespoons balsamic vinegar
  • 1-2 cloves of garlic, chopped
  • 2 teaspoons chopped fresh parsley
  • 2 teaspoons chopped fresh basil
  • 1/2 teaspoon dried rosemary
  • sea salt and freshly ground black pepper, to taste

Preparation:

Place all ingredients in a bowl and whisk together.

Pour over grilled chicken breast, or vegetables that have been grilled, or roasted, with a small amount of olive oil and sea salt.

Summer Grilling Tip: I throw almost all vegetables on the grill in the summer. The taste is fabulous, and it doesn't heat up the kitchen. The downside is that it can be difficult to keep the veggies from falling through the grates. The solution? A good grill pan. Simply toss vegetables such as asparagus, pieces of onion, scallions, slices of zucchini or eggplant, cherry tomatoes, mushrooms, etc. into the pan with a little olive oil and salt and you are good to go.

The pan I like to use is made of stainless steel (you don't want to use non-stick here because at the very high temperatures you will be releasing toxic chemicals into your food), and because it has sides, which makes it easier to stir the veggies, and lift them out when done.

Enjoy!

Wellness Extended Newsletter

July 2009 Volume 2, Number 7wellness

Wednesday, July 8, 2009

Alert: Important Bok Choi Addendum

SANY0400Due to an email filing error, I neglected to include this delightful recipe from Alan Rojer.

Alan is also currently experimenting with creating Kim Chee from our Chinese cabbage, and we eagerly await his full report.

'Here's a bok-choy quickie, for use with a grill wok.

Ingredients:

    4 heads baby bok choy
    1 tbs chopped ginger
    1 tbs toasted sesame oil
    1 tbs soy sauce
    1/2 head garlic, peeled and sliced
    crushed red pepper
    (all quantities are approximate and subject to your personal taste)

Preparation: 

    Trim bok choy at base.
    Toss with other ingredients.
    Cook on med-high heat in a grill wok, about 5 minutes,
    stirring regularly, until wilted but still crispy.

    Suggested for serving with grilled flank steak, sausage, salmon or
    shrimp kebabs.  Bon appetit!'


Thanks Alan!

Sunday, July 5, 2009

Bok Choi and Chinese Cabbage Round-up


SANY0400 To date we've received a variety of delicious bok choi and some extremely excellent Chinese cabbage. It's really quick and simple to make delicious dishes from these leafy veggies, so I decided to present a number of ideas in 'round-up' format. What does that mean? I am not quite certain, but I think it means they are more like sketches than precision-guided recipes. Try them all!

 Here's a quick idea for bok choy and/or Chinese cabbage.

Just as a disclaimer, I've made this many times but just cook it by instinct. I don't have a written recipe, so here it is from my head without testing the amounts. People should feel free to adjust as needed but this is the basic idea.

-Randy Rabney

Tofu and Bok Choy Stir Fry

The sweetness of the apple juice and saltiness of the shoyu balance each other nicely here.

Ingredients:

  • 1/2 medium onion, thinly sliced
  • 1 clove garlic, thinly sliced
  • 1 inch piece of ginger or more to taste, thinly sliced or diced
  • 1/2 a package of firm or extra firm tofu, cubed
  • 2 cups loosely packed baby bok choy or Chinese cabbage, in bite size pieces (leaves separated)
  • 2 Tablespoons shoyu or tamari (high quality soy sauce)
  • 2 Tablespoons apple juice
  • Oil for cooking

You can add a few drops of your favorite hot sauce if you like some heat, a few drops of rice wine vinegar and or toasted sesame oil also makes a nice addition (all are optional).

Preparation:

Heat oil in a saute pan over medium high heat. Add onion and garlic, stirring as needed, when onion starts to soften, add ginger and stir again. Add the tofu and let it sit until it's easy to turn then stir and add in the ribs of the cabbage and reserve the leaves. Cook about 2-3 minutes and add the leaves. Cook 1 more minute or so until the leaves start to wilt and add the shoyu and apple juice, you can add more of either liquid if needed (shoyu if you want more salt, apple juice if you want less or equal amounts of each if the flavor is good for you).  Taste for seasoning and enjoy.

-Randy


Chinese Cabbage Slaw

Here is another one that works well with both Chinese cabbage and bok choi. I made it a couple of weeks ago with the spicier, dark-leafed bok choi, and I have twice now used our fine heads of Chinese cabbage for this recipe. It's pictured above. Again, this is a prepare-to-taste recipe and can be user-adjusted to accommodate a wide range of palates. Tinker with the vinegar/sweetening ratio to your liking.

Ingredients:

  • 1/2 cup, total, cider vinegar and/or rice vinegar- in any proportion
  • 1/4 cup mirin
  • 2 teaspoons brown sugar
  • tablespoon soy sauce (I'm deferring to Randy on the shoyu!)
  • teaspoon toasted sesame oiil
  • 1 head Chinese cabbage chopped coarsely, or equivalent amount of bok choi

Preparation:

Place chopped cabbage in large mixing bowl. Whisk remaining ingredients in smaller mixing bowl. Pour mixture over cabbage and toss lightly. Cabbage will release lots of liquid and wilt before your very eyes! After this process has slowed, remove cabbage and liquid to an appropriately-sized serving dish. Keeps for days in the fridge if you don't demolish it on the first round.

-Clyde

Here are a couple of quickies:

1- This is the simple recipe passed on to me by @EpicureanJourny "grilled baby bok choy: skewer on soaked bamboo sticks, baste with a little Hoisin sauce, and grill [or griddle if you have a good fan!] for a few minutes."

-Jocelyn Ruggiero

2- Sauteed Bok Choi with garlic: wash baby bok choi. Leave whole or slice in half lengthwise. Sauté thinly-sliced garlic in olive oil until it turns golden, just short of brown. Add bok choi. Toss for a few moments over medium-high heat. Add 1 cup water or chicken stock. Cook until bok choi is translucent but  still retains some crunch. Add coarsely ground pepper and salt to taste.

Thursday, July 2, 2009

Collards for the 21st Century

My Grandma had a simple, straightforward method for cooking kale or collards. In fact, it was her go-to method for any green that didn't wilt by glaring at it.

SANYO DIGITAL CAMERA           The recipe required the washed greens to be placed in a large pot and covered with water. Ham hocks, or more often, a few large chunks of double-smoked bacon obtained from Amish country in Lancaster, PA, was added as the primary flavoring ingredient. Then, the whole mixture was boiled full-throttle for an hour. At the end, the greens were ladled out of the liquid and a little cider vinegar was sprinkled on before serving. It was hearty, if not heart-healthy.

So, in my cholesterol-challenged present, I experienced a certain saturated-fat line of thinking that made me want to avoid the addition of meat. In the end, however, I accepted it as a integral to this style of preparation.

My challenge was to modernize the recipe, using the ingredients I had at hand. The first thing to note is, the turnip greens and the collards can be combined and cooked together into an indistinguishably delicious combination. Just cut the greens off the turnips, remove as much of the woody stalks as possible and snip off any yellowing parts of the greens. Remove the stalks from the collards and wash everything thoroughly. Here is where Grandma and I diverged:

Ingredients:

  • 2 slices pancetta 3/8" thick, diced. (I get mine at Di Pietro's on Springfield Ave in Maplewood and it is exceptional)
  • 1 onion, chopped
  • 1 bunch turnip greens, cut coarsely (try scissors for this)
  • 1 bunch collard greens, cut similarly
  • water
  • red wine vinegar

Method:

Heat a large skillet. Add pancetta and stir until some of the fat renders and it browns slightly. Add the onions and stir the mixture vigorously. Don't let it burn! If the browning process gets away from you, add a cup of water and keep going. Cook until the onions are translucent.

Now add the chopped greens. Add just enough water to cover, but not drown the mixture. Cook until the greens are soft, about 15 minutes. (It seemed like 15 minutes. I was observing the greens and not the clock.) Remove the skillet from the heat.

Transfer the greens to a bowl, leaving behind the bits of pancetta and onions, as well as the the cooking liquid. Press any remaining liquid out of the greens and add back into the pot.

Now add a few splashes of red wine vinegar to the liquid. Reduce the mixture over medium-high heat. It should develop a velvety, voluptuous texture. Taste and add salt if necessary. When it's fully-reduced, remove from heat and add the greens, tossing until they are well-coated. Serve immediately, if not sooner. Some may enjoy  a sprinkle of hot sauce or red pepper flakes!


-Clyde Tressler

Tuesday, June 30, 2009

Pea Shoots by Cheryl Rogowski

pea shoots from cell phoneSo what exactly is that gorgeous looking bouquet of flowers and leafy tendrils in your share this week? Pea shoots, who would ever think to eat these was really on to something.  They taste just like peas and are perfect for a delicate summer salad.  In Chinese cuisine they have been popular for years, they are loaded with Vitamins A and C.


How to store:
Pea shoots are fragile and best used within one to two days of harvesting. Keep them wrapped in paper towels in an open plastic bag in the vegetable bin of the refrigerator
Some quick serving ideas:
Add raw pea shoots to a tossed salad.
Serve a fresh mound of pea shoots with a squeeze of lemon juice.
Add pea shoots to any stir-fry or soup near the end of cooking time.
Toss wilted pea shoots with sprinkles of ginger and sugar to taste.

                        Flash-Cooked Greens with Garlic

1-1/4 lb. pea shoots or other greens, rinsed
1 teaspoon canola or olive oil
a couple of garlic scapes
2-1/2 tablespoons rice wine, sake or water
¼ teaspoon salt, if desired

Preparation

Heat oil in a wok or skillet. Add pea shoots and garlic; toss lightly about 20 seconds, then add rice wine and salt. Toss over high heat 1 minute or less, just until wilted. Lift out of pan, leaving the liquid. Serve. (Adapted from A Spoonful of Ginger: Irresistible, Health-Giving Recipes from Asian Kitchens by Nina Simonds, Knopf, 1999.)
The original recipe called for garlic cloves I changed it so you can use the scapes you have in your share this week.
I'm in the process of adding some more recipes and links on the website for the shoots and other veggies.


Some Nutrition Information:
Pea shoots may also contain valuable phytochemicals. Certain pea plants have these natural disease fighters, but it is not known whether garden peas contain them. The phytochemicals found in other types of pea plants include lignins, a flavonoid called quercetin, and caffeic acid. Researchers believe these substances help prevent cancer in different ways and have other beneficial health effects.
      Source: Washington State University Cooperative Extension
http://agsyst.wsu.edu/peashootbroc.pdf

More on pea shoots:

www.peashoots.com

http://www.tastespotting.com/search/pea+shoot/1

http://blogs.kqed.org/bayareabites/2009/02/12/i-heart-pea-shoots/

Pea Shoot Pesto

  • 3 cups pea shoots
  • 3/4 cup walnuts
  • 1/2 cup cilantro
  • 1/4 cup Parmesan
  • 2 cloves garlic
  • 3/4 teaspoon salt1/3 cup olive oil

Preparation

This couldn’t be simpler — add all of the ingredients except for the olive oil into a cuisinart or blender and pulse until finely ground, then stream in the olive oil while blending.

To store the pesto, put it in a tupperware and pour a thin film of olive oil over the top before putting it in the fridge or freezer.

-Kerry Tilden

Saturday, June 27, 2009

Participating in the Blog

If you are wondering about participating in the Maplewood CSA blog, here's how it works. You are immediately invited to add comments to any post. Feel free to veer off in any direction, and especially in the direction of what we received in our weekly share.

If you would like to post an article or recipe, just email it to me at:

clyde@amalgamated-clyde.com

While I am acting as  moderator, I am operating with a light touch, and will only serve to spruce things up and fit them into the format of the blog. I will not edit your content, unless, perhaps, you request my help. Thanks! I look forward to your participation.

Friday, June 26, 2009

Pickled Beet Shoot-out

chioggia_beets My neighbor and I were discussing how we would use the beets from our Week 3 bundle, and both of us decided we would pickle them. We had slightly differing recipes and thought it might be wise to prepare them both and have a side-by-side tasting. The results showed that pickled beet recipes seem to taste pretty much the same, but that the emphasis on certain adjunct flavors varies somewhat. I present below both recipes, followed by a final analysis. By the way, the recipes work well with any of the varieties of beets we received.

Beet Salad

source:  Southern Light Cooking by Charles Pierce

Ingredients:
1 lb of beets (I used my whole share of beets which was 1 large Candy Cane beet and 1 small red beat)
1 teaspoon dry mustard
1/4 teaspoon sea salt
1/8 teaspoon freshly ground pepper
2 tablespoons red wine vinegar
2 tablespoons canola oil (can also use safflower oil)
2 tablespoons orange juice
1 small Vidalia onion, diced into 1/4" cubes
1/2 cup toasted, salted pecans for garnish


Preparation:

1.  Trim beet tops leaving 3" of the green on beet.  Cook beats for 30 - 40 minutes in large pan of boiling water or until tender to the center when pierced with a knife.  Drain into colander and rinse under cool water until cool enough to handle.  Trim tops and roots off of beets and peel off skins.  Cut beets into 1/4" or 1/2" cubes.

2.  In medium bowl, whisk together the mustard, salt, pepper, and vinegar.  Gradually whisk in the oil and orange juice until well blended.  Add the beets and cubed onions and stir gently until well coated with the dressing.  Cover and refrigerate at least 2 hours, or until chilled.

3.  Serve alone or over salad greens.  Garnish with pecans.

-Crystal Comeaux


Pickled Beets #2beets_filtered

Ingredients:

  • 1 bunch of beets, any variety
  • 1/4 cup cider vinegar
  • 1 tablespoon brown sugar
  • 1 tablespoon extra-virgin olive oil
  • 1/2 teaspoon dry mustard
  • salt and pepper

Preparation:

Cut off the greens and reserve. Scrub the beets to remove any dirt, then individually wrap them tightly in aluminum foil. Place the wrapped beets in an uncovered baking dish that is small enough to crowd them together. Roast them in the oven at 350° for an hour to an hour and a half. They are done when you can stick a fork all the way into the beet. Remove and let cool. You can also put them in the fridge at this stage and resume the following day. When cool, the beet jackets will slide off easily.

Cut them into 1/4 inch slices and place in a serving bowl. In a mixing bowl, combine the other ingredients and whisk together. Pour the mixture over the sliced beets and cover the bowl with plastic wrap. Refrigerate overnight, turning the beets once (in the wee hours of the morning) so they all have equal time to bathe in the marinade. Serve.

-Clyde Tressler


Final Analysis

Though both recipes taste similar, Crystal's preparation had a bit more punchy mustard flavor, which I liked. Next time I believe I will jack-up my mustard amount a bit. The pecans were a delightfully crunchy surprise ingredient that I found quite agreeable. Overall, I think I still prefer the sliced beet approach to the diced beet approach, but consider this a method of controlling the impact of the beet flavor. Sliced beets retain more intensity. I still like the cider vinegar/brown sugar combo that I used, but I did appreciate the Vidalia onion.

So try them both and see for yourself!

Wednesday, June 24, 2009

What to do with Carrot Tops?

Well, my standard answer to this frequently asked question is 'compost them.' I usually find that carrot tops are too tough and bitter to be of much use to me. However, I have obviously given short shrift to this useful portion of the plant and so, to set the record straight, I submit the three top replies from my google search for carrot top recipes. If anyone tries one, please let me know. At any rate, do chop them off the carrots as soon as possible, as the frond-like foliage will dissipate water from the carrot root.

clyde
email: clyde@amalgamated-clyde.com
clipped from www.google.com
  • carrot top and rice soup (tuscan)

    Review/Rate this Recipe Save to MyRecipes Rating: Title: Carrot Top And Rice Soup (Tuscan) Yield: 4 Servings Ingredients 3 tb extra-virgin olive oil ...
    recipes.chef2chef.net/recipe-archive/13/078137.SHTML - Cached - Similar -
  • Carrot Top & Quinoa Soup Recipe : Recipezaar

    4 posts - 3 authors - Last post: Jan 4, 2008
    Try the Carrot Top & Quinoa Soup recipe from Recipezaar.com.
    www.recipezaar.com/Carrot-Top-Quinoa-Soup-273145 - Cached - Similar -
  • Consider Adding Carrot Greens to Your Family Recipe Collection

    In thinking about using carrot tops like parsley, I guess you could use parsley in the above recipe. In fact, almost anything cooked with onion, garlic, ...
    hubpages.com/.../Consider-Adding-Carrot-Greens-to-Your-Family-Recipe-Collection - Cached - Similar -

  • blog it

    Beet Greens Recipe

    SANYO DIGITAL CAMERA           Ingredients
    • 1 pound beet greens
    • 1 strip of thick cut bacon, chopped (or a tablespoon of bacon fat)
    • 1/4 cup chopped onion
    • 1 large garlic clove, minced
    • 3/4 cup of water
    • 1 Tbsp granulated sugar
    • 1/4 teaspoon crushed red pepper flakes
    • 1/6 cup of cider vinegar
    Method

    1 Wash the greens in a sink filled with cold water. Drain greens and wash a second time. Drain greens and cut away any heavy stems. Cut leaves into bite-sized pieces. Set aside.

    2 In a large skillet or 3-qt saucepan, cook bacon until lightly browned on medium heat (or heat 1 Tbsp of bacon fat). Add onions, cook over medium heat 5 to 7 minutes, stirring occasionally, until onions soften and start to brown. Stir in garlic. Add water to the hot pan, stirring to loosen any particles from bottom of pan. Stir in sugar and red pepper. Bring mixture to a boil.

    3 Add the beet greens, gently toss in the onion mixture so the greens are well coated. Reduce heat to low, cover and simmer for 5-15 minutes until the greens are tender. Stir in vinegar. (For kale or collard greens continue cooking additional 20 to 25 minutes or until desired tenderness.)

    Serves 4

    -Barbara Savino

    Sunday, June 21, 2009

    Kale and Lentil Soup

    SANYO DIGITAL CAMERA           In The spirit of 'what i did with my share,' I'd like to kick-off the posts with this soup that I made. It's a kale and lentil soup that uses three of the items we received in our share, and it only takes about twenty minutes to prepare.


    Ingredients

    • 1/2 lb green lentils
    • 1 bunch kale
    • a few carrots
    • handful of parsley
    • garlic scapes
    • chicken stock or water

    Preparation

    Wash the kale and steam it in a 6-quart pot. After it softens, remove it and place on a cutting board to cool. There should be about a cup and a half of colorful kale broth remaining in the pot. To this, add the lentils and the carrots, diced. Add enough additional water and/or chicken stock to cover the lentils and carrots, and simmer until they are soft. Meanwhile, coarsely chop the kale and and parsley. Chop the scapes into 1/4" lengths- I put in about half a handful. Remember, soup is very forgiving when it comes to the amounts of ingredients.

    Toss in the kale, parsley and scapes, and cook for a few additional minutes, adding more liquid if necessary. Season with salt and pepper and serve.

    -Clyde Tressler, Maplewood

    Welcome to the Maplewood CSA Blog

    scape copy

    The Maplewood CSA blog is a place to exchange ideas related to our community of produce shareholders. How about that!

    Let the cooks and non-cooks, foodies and non-foodies, gourmets and gourmands come together and participate in an open dialog that benefits everyone. Feel free to to guide the discussion in any direction you please, but remember, the central theme of this blog is 'what are you doing with your share and why?' That said, recipes, nutritional topics, comments and suggestions are all welcome.

    As  your humble line-server from Week-2, it was my great pleasure to have the experience of observing the wide range of familiarity with the items that constituted our share. Some who were cooks gladly offered their ideas about what they might do with their garlic scapes, while others wondered 'what is a garlic scape?'

    Quite a few of us, it seems, are looking for ways to introduce more fresh vegetables into our diets, and are using the reliability and the upfront investment in the CSA as source of motivation. Bravo! Some of us even aspire to cook more at home, relying less on prepared food items, while others expressed their appreciation at having a source of naturally-grown produce so conveniently available.

    With such a diverse group of circumstances, isn't it only natural that we come together to share? This is your blog. Use it wisely.

    -Clyde Tressler, Maplewood